The berimbolo. It took the world of competition Jiu jitsu by storm several years ago. Grapplers such as the Mendes and Miyao brothers carried the move to prominence and built whole games around it. The term has been said to mean be slang for a mess, tumbleweed, the act of whipping up a cake, or a thing which cannot be defined. It doesn’t really matter what it translates as, what does matter is that done properly it can be a six point play in sport Jiu Jitsu.
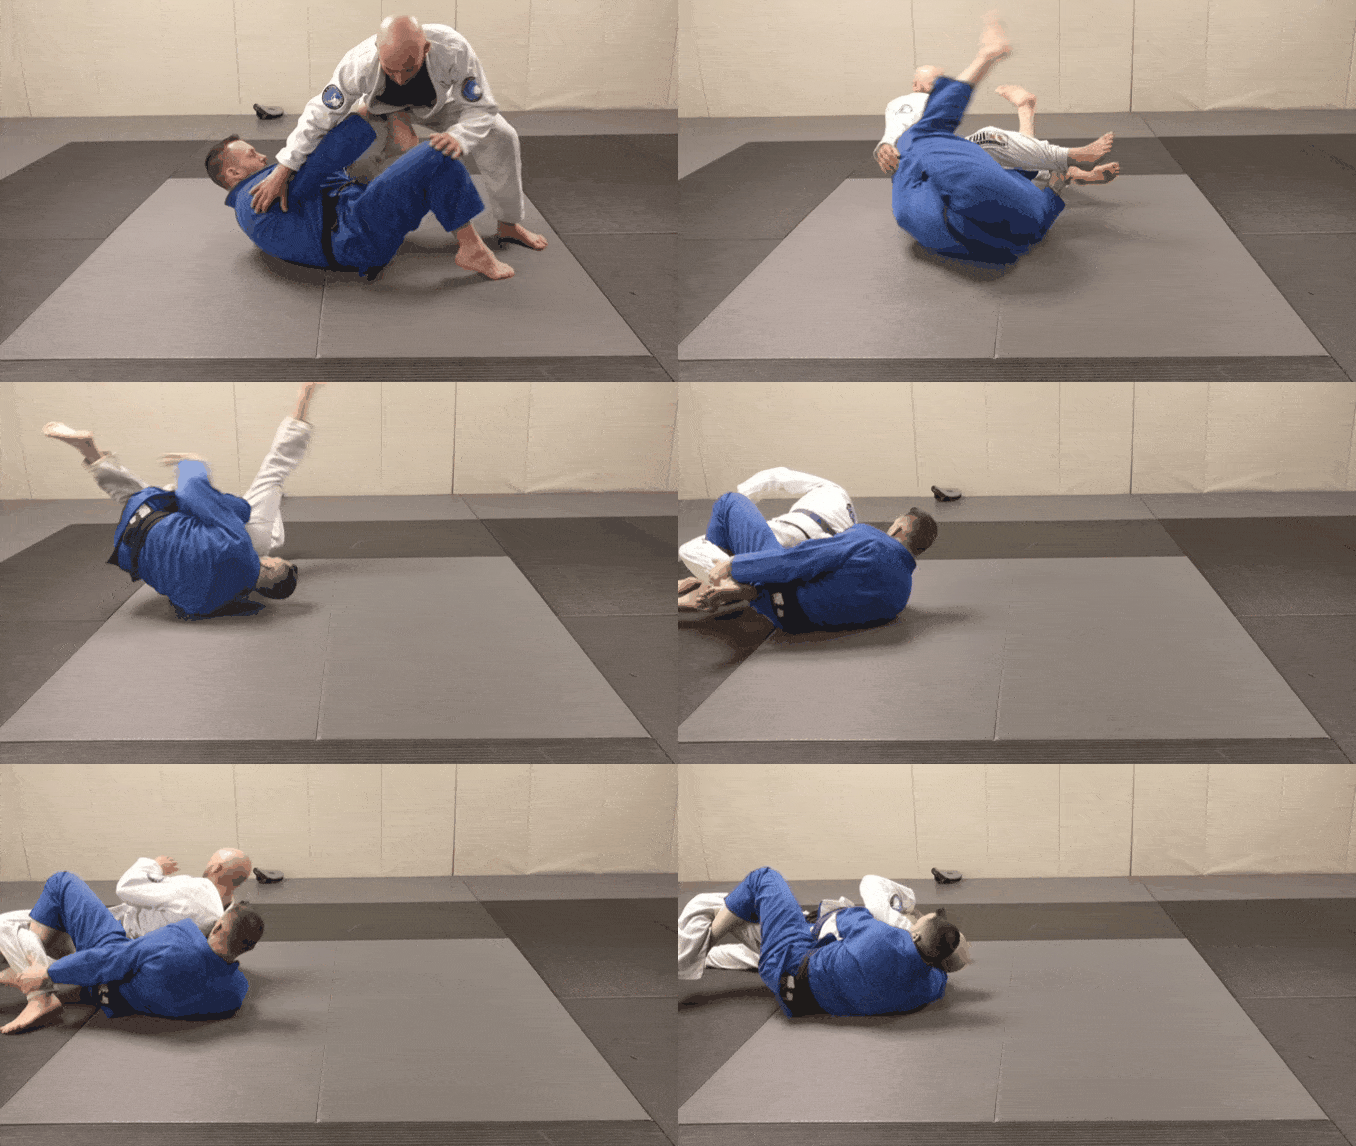
The berimbolo is essentially a three part maneuver. 1, get them grounded. 2, invert. 3, secure the back. Lets look at each on it’s own.
1, Get them grounded. Assuming they are standing in your open guard, the first step is to put them on their butt. If you are facing someone else who is also looking to play the bottom, as in the case of a double guard pull, then this step is replaced with leg pummeling for the outside line, or DLR hook. However, for our purposes we will assume they are standing. From a standard DLR set up we will look to secure a strong upper body grip with which to off balance. The most common grip for this is the belt. Once we have the belt and the foot grips, we use a push pull motion to load the weight onto our DLR hook. From here we kick out with the hook, pull on the belt, and push the foot away to drop the opponent to the mat.
2, Invert. Keeping the same grips we need to Granby roll toward our opponents head, keeping our head close to their hip. At this point, our DLR hook will extend under the near leg and over the far leg, hooking the outside of the far leg with our ‘shoe laces.’ Our other leg will do the same, but across the belt line to the far hip. The goal is to secure the feet as tight as possible to the far side to limit the risk of the most common counter to the berimbolo, the toe hold. If we leave the non DLR hooking foot floating out in space as we invert the toe hold is a very real danger. Here is two angles so you can see what I'm trying to do with my feet.
3, Secure the back. Once inverted, we continue to roll through, pulling our opponents legs forward to expose the back. At this point my preference is to let go of the foot grip we started with and exchange it for the other, far foot. by pulling that foot toward us, we make the space to insert the knee of the leg which was formerly our DLR hook. Placing our knee behind their knee we can pull on the foot as we bridge and turn their hips further exposing the back. the counter pressure here is very strong and hard to resist. Keep that structure in place until we can switch our belt grip for a horse collar grip and draw ourselves chest to back. At this point we should already have one hook in and simply need to set the second and secure our seat belt grips.
All together it should look something like this.
In order to actually score six for this sequence, you would need to temporarily assume top position after stage one but before stage two. This can further complicate an already complicated movement though and most people do not opt to do so.
As I said in class, I don’t really use this technique often. There are very rare circumstances in which I will, but generally, I find it a little too sportified for my taste. I don’t care to invert as a general rule as it feels like I am too many moves away from being able to stand. I feel most confident in my grappling when I am in a position that would allow me to win a race to standing and being upside down I tend to lose those races. That is not to say the move is without value, it is just not to my personal taste. Many better grapplers than I have done very well with this this style of wrestling. So give it a shot and make up your own mind.


